Product Description
The XILS 3 Version 2.0
The Incredible Matrix Modular Analog Synthesizer
The XILS 3 V2.0 not only emulates the Synthi (VCS 3) modular synthesizer, it also adds an emulation of the 256 Analog Sequencer, the natural companion of the VCS 3.
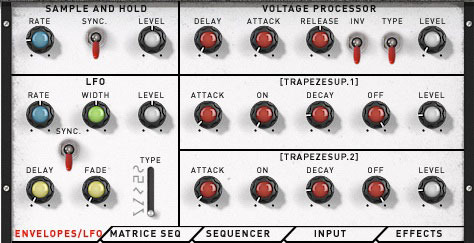
Is that all? No, of course, we added a SECOND Matrix, with 2 additional envelopes, one LFO, a detailed Sample and Hold module, and a Voltage processor…
And some input modules: Gate, Transient, Envelope Follower and Pitch Tracker to transform the XILS 3 into an advanced Effect Processors!
This means hundreds of additional connections. Add to the pile the analog chorus with its three modes, the analog delay and the phaser... the picture emerges.
In the XILS 3, you can connect everything with everything, and you get more than 800 possible different connections per patch (‘Only’ 583 simultaneous connections possible).
Did we say at Audio Rate ?
An endless source of inspiration for those who want to go deep into the heart of Analog Modular Synthesis.
It’s nearly impossible to summarize what the XILS 3 can do, but, in short, here’s the list of the main modules:
- 6 Oscillators grouped in 3 pairs, with WaveShaping (on sine wave, saw, triangle and square)
- 1 Noise Oscillator ( With Noise color )
- 1 Analog Filter, Non Linear and zero delay Behaviors, with 3 Modes (12/18/24 dB LowPass)
- 3 Trapezoidal Envelope Generators, Looping EG in the time of analog (Switchable to ADSR )
- 2 Polyphonic LFOs ( including 1 Oscillator acting as LFO at audiorate )
- Polyphonic Ring Modulator
- 2 independent outputs feeding the Stereo Bus, each with one analog Lp/Hp filter
- Programmable Joystick Vector Controller ( up to 32+32 modulation targets )
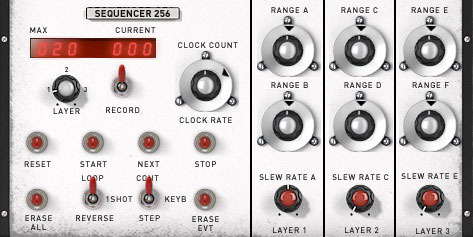
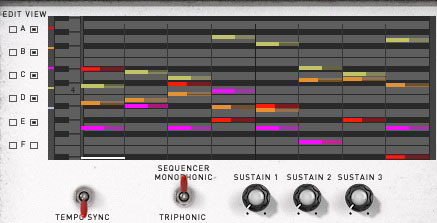
- Polyphonic Sequencer with 3 independent lines, Slew rates, 3 recording modes.
- Sequencer can behave as modulation source.
- Pitch Tracker, Envelope Follower, Transient, Gate, Sample & Hold Modules
- Chorus, Delay, Spring Reverb
- 6 Play modes (including Unison 2/4/6 ), Polyphonic and mono Portamento/Glissando/Legato, 2 different Keyboard Scaling, Polyphonic Aftertouch and VCA handling.
- Hundreds of presets made by worldwide famous Sound Designers
- Preset Database Engine ( Find the right patch in a flash, create your own tags )
- Comprehensive manual with a getting started and tutorial sections
- Instrument or Effect plug-in
1969 : The PIN MATRIX REVOLUTION (No More Cables Anywhere)
In a modular synthesizer, you can connect any module to another one. Peter Zinovieff, the visionary synth Wizard, established with the EMS series a new way to connect modules : The Pin Matrix. Just plug a pin in the Matrix, and the connection is set.
Advantages of these techniques were obvious, breathtaking : More inputs and outputs for each module. No more cables cluttering the synth panel. Easy to operate, easy to read, and to visualize, and build, your patch . No more roadies : The analog modular synthesizer suddenly became portable
The XILS 3 offers the same advantages, and even brings a lot more on the table. Let’s now see the different modules.
Matrix Synthesizer
The core of the synthesis is based on the original audio modules:
- Six oscillators grouped in Three pairs
- One Low pass filter with 12, 18 and 24 db slope
- One spring reverb
- One Trapezoidal looping envelop
- One Polyphonic Ring Modulator
- One Noise generator
- Two output static filters
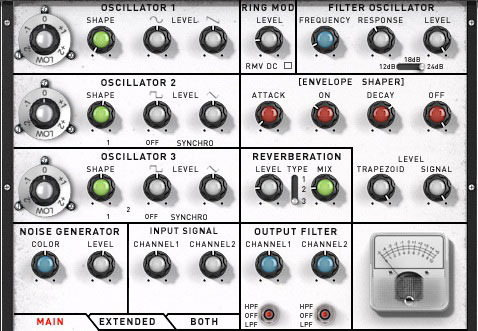
Oscillators: Beyond the digital limitation, in a true analog emulation, as in all XILS-lab instruments, the freedom of the sound which one has in mind when listening to hardware analog synthesizers, the analog spirit have been preserved.
XILS 3 oscillators were modeled to reproduce as close as possible the original waveforms.
The following figures compare the different waveforms of the original AKS model and those of the XILS 3.
As you can see, the raising front is sharp, but as the signal reaches its maximum, it becomes slower. This gives XILS 3 Oscillators an unique analog sound and character : soft and warm, yet very rich in harmonics.
No synthesis can be done without a good filter : the XILS 3 multimode filter was modeled to reproduce the analog character of the old machine.
The 18 and 24 db low-pass types can self-oscillate, and internal non linearities have been finely reproduced: It is faithful to the "zero-delay" behavior of real life to give you a big smile when sweeping it.
The PIN MATRIXES: As we saw, modules have to be connected through patch areas called Pin Matrixes.
The XILS 3 offers no less than 5 Pin Matrixes: 256+225 points dedicated to the main audio synthesis, one for the trig connections, and another pair for the sequencer connections (one for the modulation and one for the trig connections) Experts will spot at once that, in the extended Matrix, you can freely define some sources and destinations in the last two rows of lines and columns, like S&H, or even Envelope Segments.
And, yes, that means even more fun, and ultimate tweaking possibilities!
The Extended Modules (Augmented Matrixity)
To increase the sound design possibilities, we have added 5 other modules, intended to be connected via the Extended Matrix (225 new possible connections)
- Two additional envelopes (Trapezoidal or ADSR)
- One Tempo syncable LFO
- One Tempo syncable Sample and Hold
- One voltage processor (with a delay feature)
The Polyphonic Sequencer
The Sequencer has been inspired by the EMS 256 sequencer, a 3 layers/2 tracks powerful device with some unique features, like 3 independent slew rate knobs.
Here again a few things were added, like Sequencer Lines acting as Modulations Sources in a special Matrix. Interactions that you cannot reproduce in even the most sophisticated DAW.
- 6 independent Sequencer lines.
- 3 Record modes (Live, Step, Edit)
Vector Synthesis
The Pin Matrix and looping analog envelopes weren’t the only innovative features of the EMS series. Vector Synthesis should definitely be added to the list. The Joystick, with its numerous inputs and outputs, should be regarded as a giant step toward Vector Synthesis, and what is now known as Macro controllers.
With the XILS 3 Joystick, you can not only make fascinating real time controlled evolutive sequences or performances, but also find a lot of interested variations patches nested in a single patch. The XILS 3 V 2.0 factory library has been completely rewritten to benefit of the Joystick and other real time controllers.
The Effects
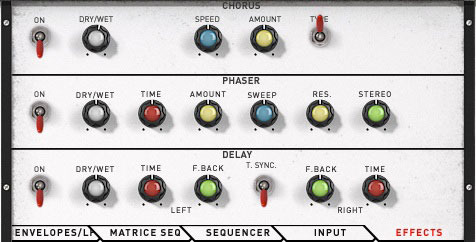
The XILS 3 provides three warn and wick sounding audio effects:
- 3 Modes Chorus
- A Delay (Tempo Syncable)
- A Phaser (with enhanced analog behavior)
Using the XILS 3 as an Effect Processor
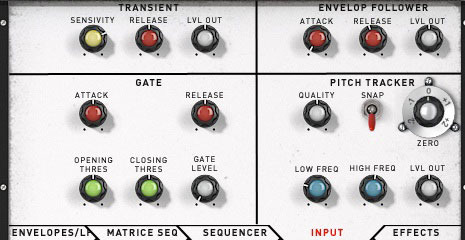
The XILS 3 can also be used as a terrific effect processor. The plug-in inputs can be used directly, feeding the filters, or as audio rate modulation sources..... endless possibilities.
To increase a little bit the fun, we added this time 4 input audio process, making XILS 3 a fantastic mangling machine!
- Transient Follower (which generates trigs or envelops)
- Envelope Follower
- Featured Gate
- Pitch Tracker
System Requirements
Mac
- Mac OSX 10.5.0 and later : VST, Audio Unit, RTAS (Protools 7.0 and later),AAX (32&64 bits, native)
Windows
- Windows XP, Vista, 7 and 8 : VST, RTAS (Protools 7.0 and later), AAX (32&64 bits, native)
View Installation Instructions
Mac
Registration/Installation
1. Select the Apple icon from your User Account, and click the DOWNLOAD tab to obtain your Mac installer.
Note: You can also download and install the most recent version of your software from the XILS Lab Download Area.

2. Visit XILS Lab to log into/create your user account > enter your email address and password when creating a new account, then click 'Validate Form.'
Note: If you already have an existing XILS Lab account, skip to step 4.
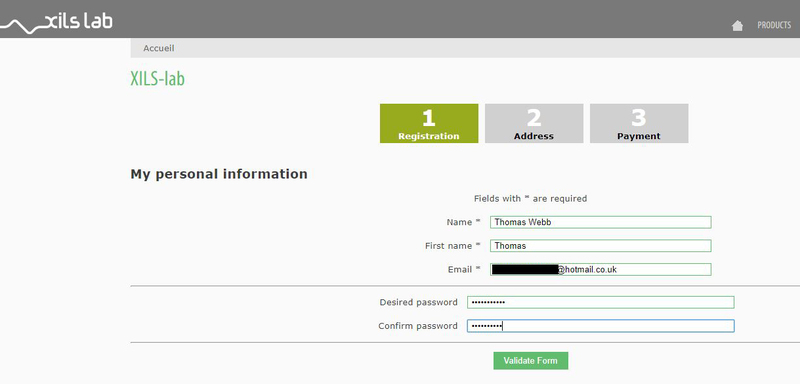
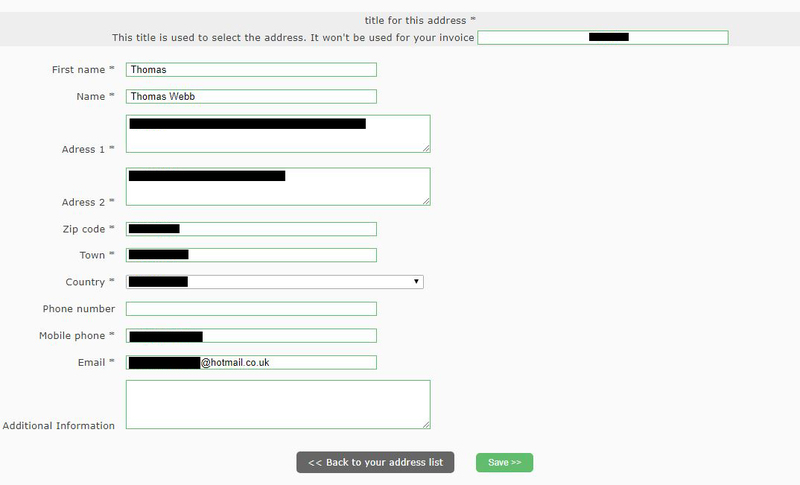
3. Enter your the required details that are marked with an asterix (*) symbol and click 'Save.'
4. Visit the XILS Lab Redemption Page and copy and paste/manually enter the serial number that is provided within your User Account > click 'Redeem Code.'

5. The serial number has successfully been redeemed, and the software licence (AC code) has been sent to the inbox of your registered XILS Lab email.
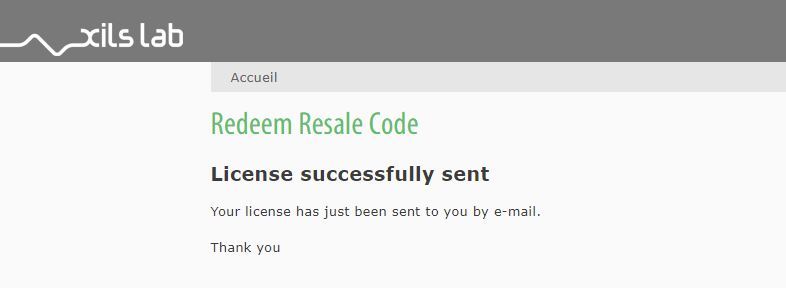
6. Log into your XILS Lab registered email inbox to locate the licence code, or alternatively find it within the 'My downloads, My Products' area of your XILS Lab account.
Note: If the message and licence fails to be delivered via email, check your junk/spam folders.
7. Locate the software .dmg installer file from the downloads section of your computer, and double-click it to launch the .mpkg installer application.
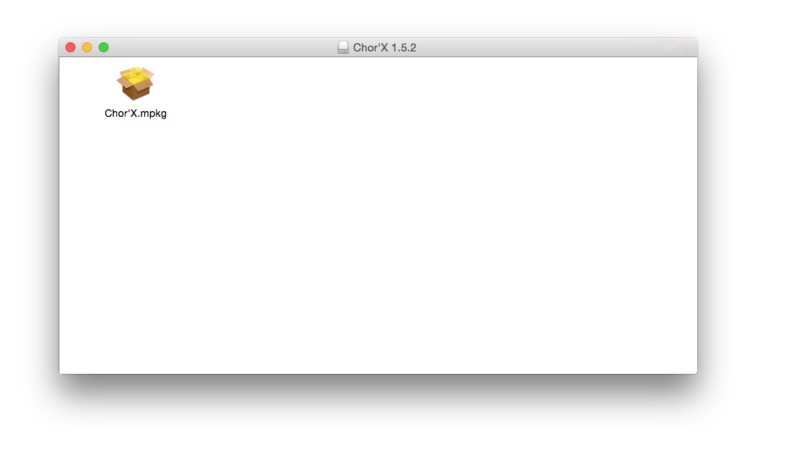
8. Double-click on the .mpkg file to begin the installation process > click 'Continue.'
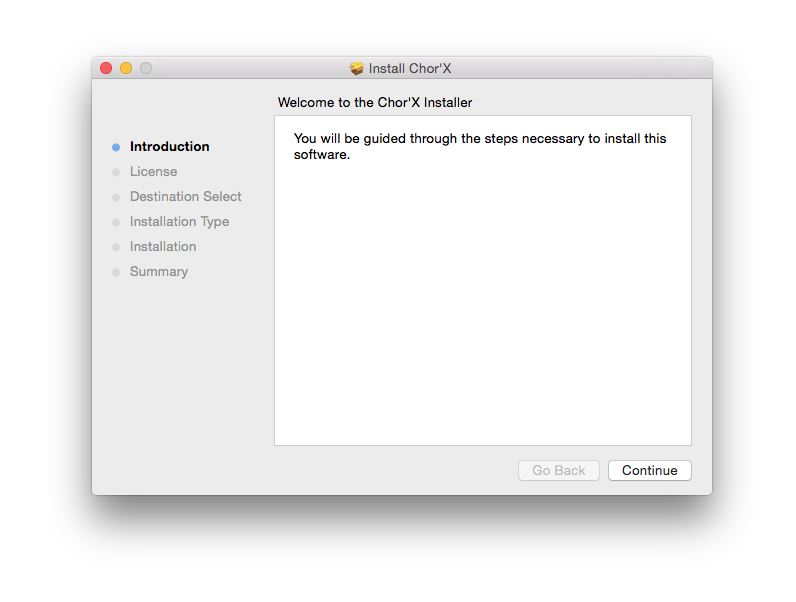
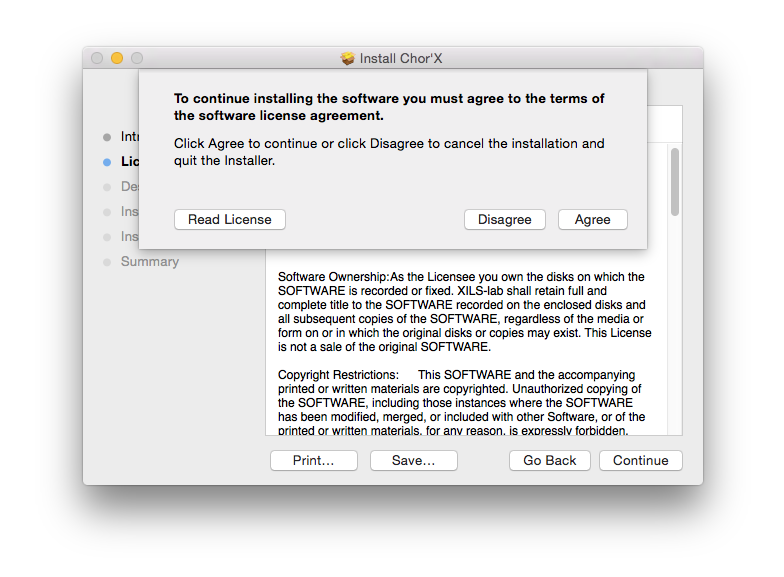
9. Read through the Terms & Conditions of the Licence Agreement > click 'Continue' > click 'Agree.'
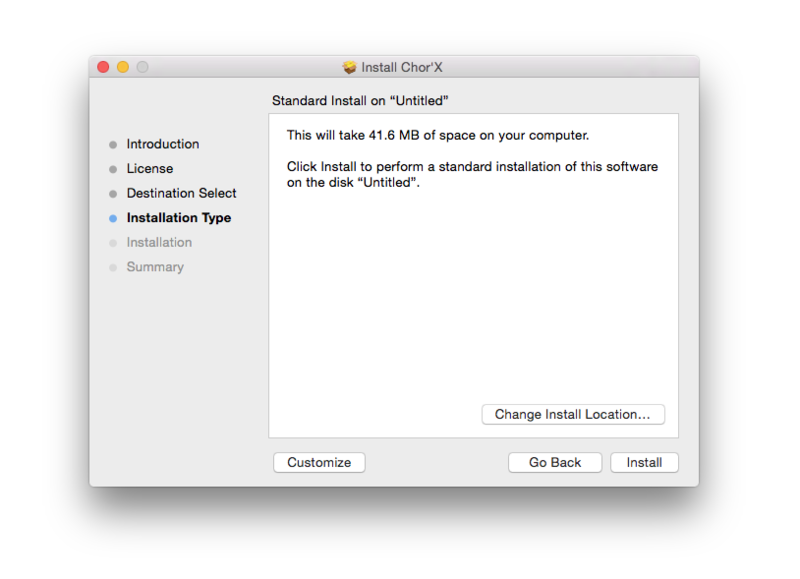
10. Review the installation and click 'Install.'
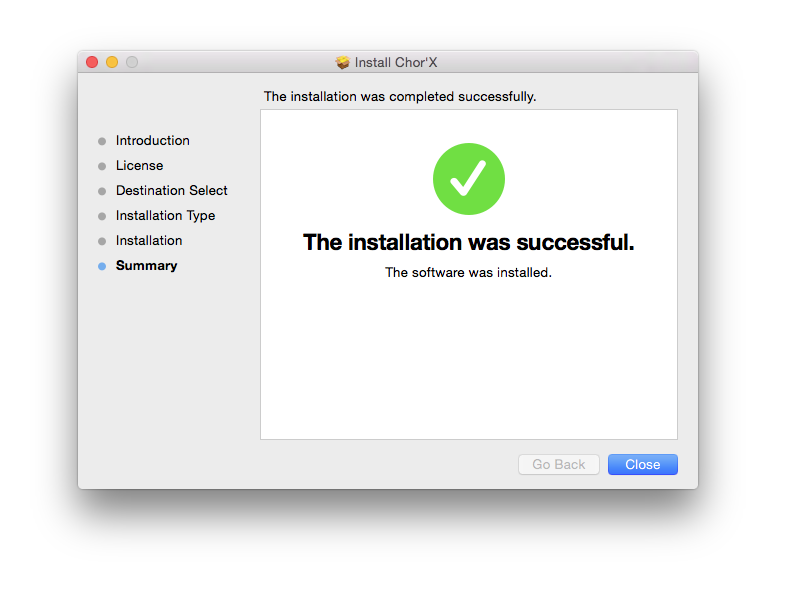
11. The installation of your software has successfully completed > click Close.
Activation
1. Open the iLok Licence Manager from your computer’s Start Menu (located at the bottom left corner of your desktop). Once the application is open, click ‘Sign In'.

2. Enter your User ID and password that you previously created on registration of your account > click ‘Sign In'.

3. Once you are signed in, click the ‘Redeem’ icon which is located at the top-right corner of the iLok Licence Manager’s interface.

4. Copy and paste/manually enter the 30-digit code from your online Xils Lab account into the available Activation Code boxes, and then click ‘Next'.

5. Select your computer as the activation location (or your iLok dongle) and then click ‘Activate'.
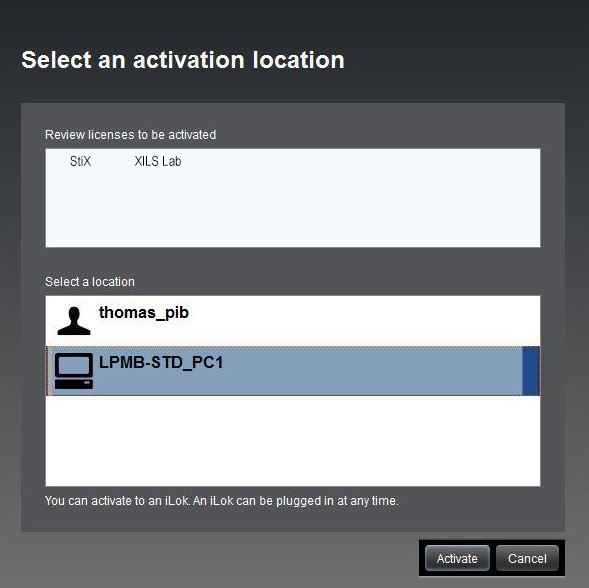
6. Confirm you are happy to activate your license > click ‘OK'.

7. Click 'OK'.

8. Your product is now activated on your computer. You can proceed and close the iLok Licence Manager.
PC
Registration/Installation
1. Select the Windows icon from your User Account, and click the DOWNLOAD tab to obtain your PC installer.
Note: You can also download and install the most recent version of your software from the XILS Lab Download Area.

2. Visit XILS Lab to log into/create your user account > enter your email address and password when creating a new account, then click 'Validate Form.'
Note: If you already have an existing XILS Lab account, skip to step 4.

3. Enter your the required details that are marked with an asterix (*) symbol and click 'Save.'

4. Visit the XILS Lab Redemption Page and copy and paste/manually enter the serial number that is provided within your User Account > click 'Redeem Code.'

5. The serial number has successfully been redeemed, and the software licence (AC code) has been sent to the inbox of your registered XILS Lab email.

6. Log into your XILS Lab registered email inbox to locate the licence code, or alternatively find it within the 'My downloads, My Products' area of your XILS Lab account.
Note: If the message and license fail to be delivered via email, check your junk/spam folders.
7. Locate the .exe software installer file from the downloads section of your computer and double-click it to begin the installation process > click 'Next.'
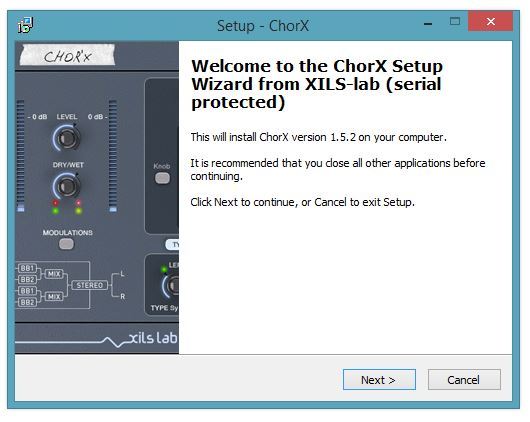
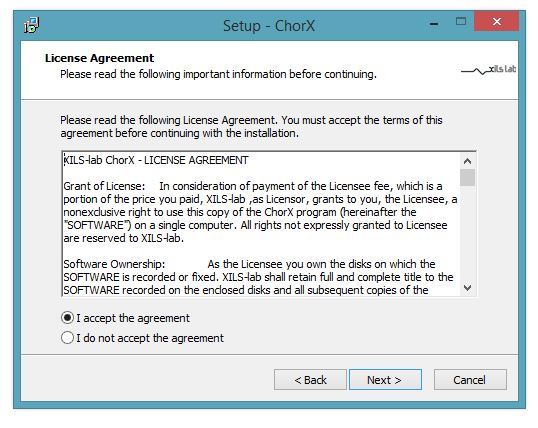
8. Read through the info and select 'I accept the agreement' > click 'Next.'
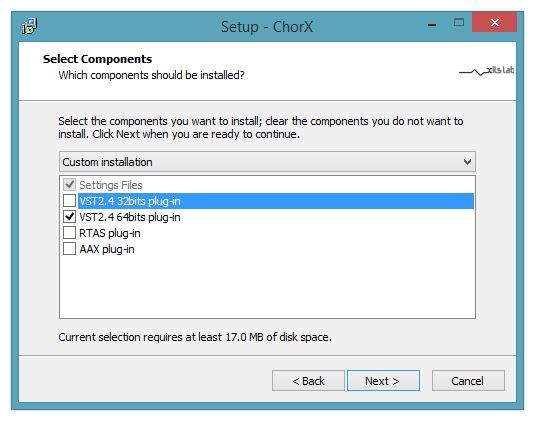
9. Select the software component (s) / compatible DAW format (s) that you wish to install, and click 'Next.'
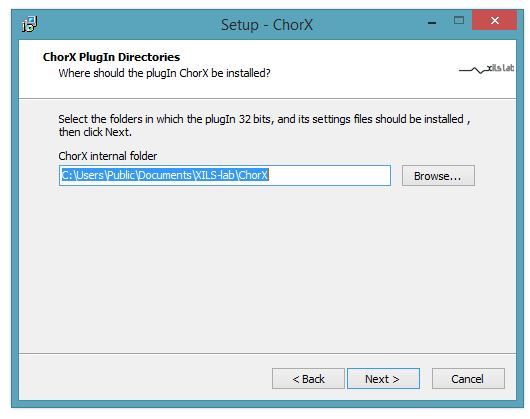
10. Select the folder in which to install the 32-bit version of your software to > click 'Next.
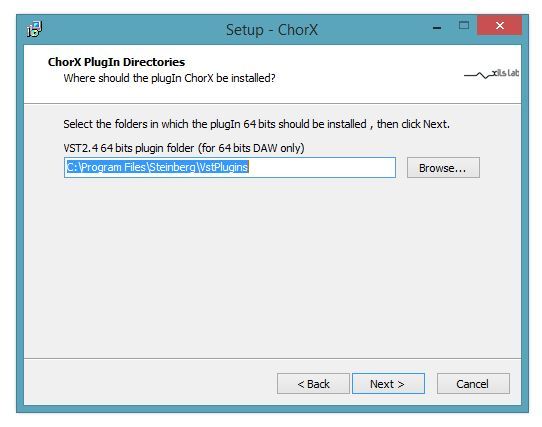
11. Select the folder in which to install the 64-bit version of your software to > click 'Next.
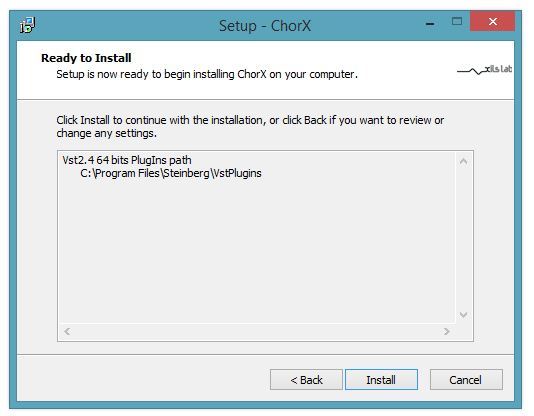
12. Review the installation and click 'Install.'
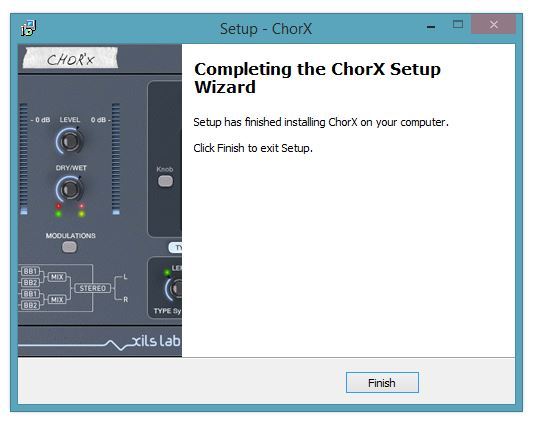
13. The installation of your software has successfully completed > click 'Finish.'
Activation
1. Open the iLok Licence Manager from your computer’s Start Menu (located at the bottom left corner of your desktop). Once the application is open, click ‘Sign In'.

2. Enter your User ID and password that you previously created on registration of your account > click ‘Sign In'.

3. Once you are signed in, click the ‘Redeem’ icon which is located at the top-right corner of the iLok Licence Manager’s interface.

4. Copy and paste/manually enter the 30-digit code from your online Xils Lab account into the available Activation Code boxes, and then click ‘Next'.

5. Select your computer as the activation location (or your iLok dongle) and then click ‘Activate'.

6. Confirm you are happy to activate your license > click ‘OK'.

7. Click 'OK'.

8. Your product is now activated on your computer. You can proceed and close the iLok Licence Manager.


