
Product Description
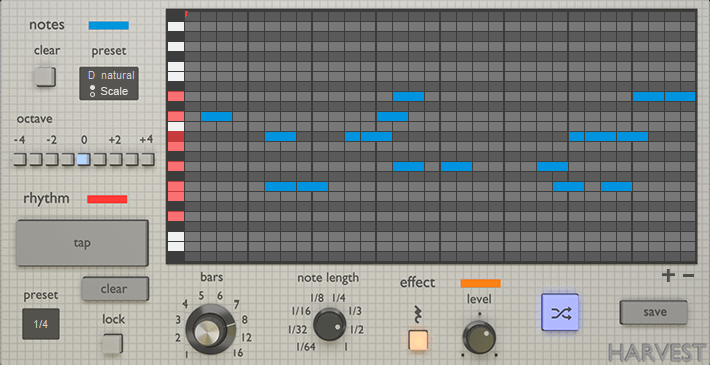
Harvest Mini is a MIDI sequence generator. It's a VST Plugin that can produce melodies, chords, and drum patterns. Generate unique loops, subtly tweak melodies or create MIDI chaos.
- Stop Running Out of Ideas
- A MIDI generator that you control with instruments
- Reduce need for sample packs
- Get unstuck using a unique workflow
- Kick start your next project
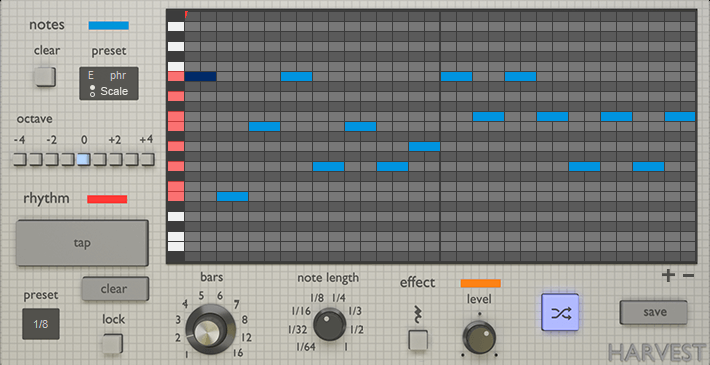
Choosing a scale and selecting a preset rhythm. The regenerate button can be used to create countless variations.

Rhythms can be tapped in with the mouse, and notes in the piano roll can be dragged around.
System Requirements
Windows
- PC with Windows 7 (with SP 1), Windows 8 or Windows 10
- DAW with VST Support
- Broadband internet connection for installation
- 20MB free disk space
Mac
- Intel® Mac with Mac OS X 10.7 – MacOS 10.13
- DAW with VST Support
- Broadband internet connection for installation
- 20mb free disk space
View Installation Instructions
Mac
Installation
1. Download the .zip folder from your Sounds Space User Account > Double-click it to extract the contents.
2. Copy the file named 'Harvest-MINI.vst'.
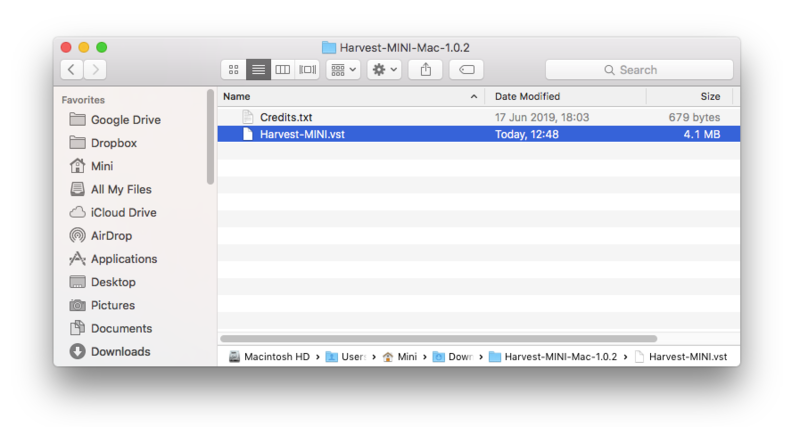
3. Paste the file here - Macintosh HD / Library / Audio / Plugins / VST
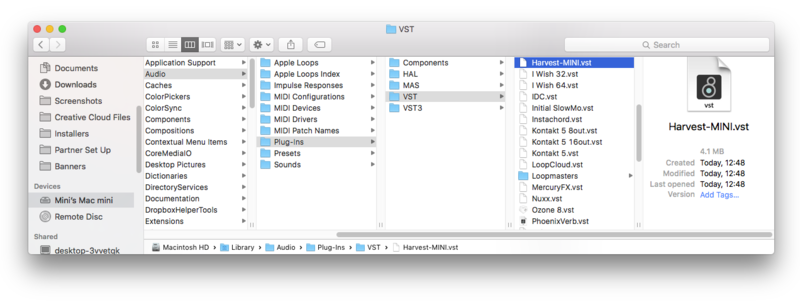
Your software is now installed and ready to use within your DAW!
Note: In the event the plugin fails to appear in your DAW, rescan your plugin selection.
Windows
Installation
1. Download the .zip folder from your Sounds Space User Account > Double-click it to extract the contents.
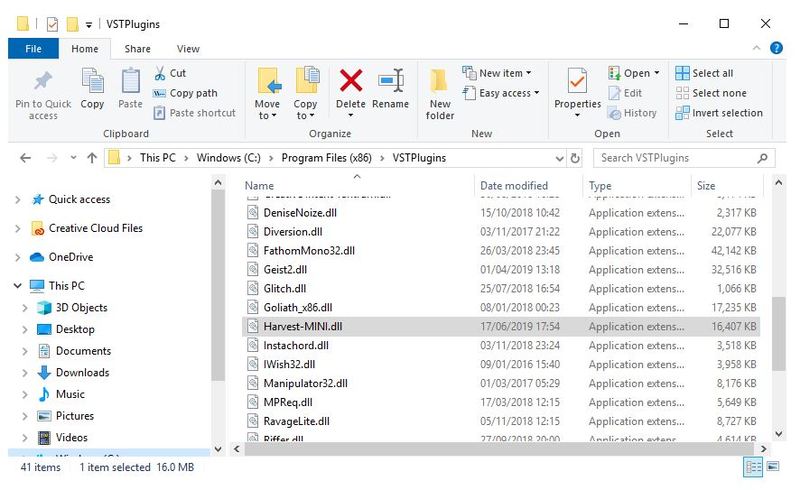
2. Copy the Harvest-MINI.dll file.
3. Paste the file in the following directories:
- C:\Program Files (x86)\VSTPlugins
- C:\Program Files\Steinberg\VSTPlugins
Your software is now installed and ready to use within your DAW!
Note: In the event the plugin fails to appear in your DAW, rescan your plugin selection.
Plugin Setup
Ableton Live
Step 1: Make two new MIDI tracks.
Step 2: Apply the Harvest plugin onto one track, and apply your MIDI instrument of choice to the other.
Step 3: On the “Midi From” drop-down on your instrument track, change from “All Ins” and select the MIDI track that Harvest is on.
Step 4: Still on the instrument track, change the “Monitor” setting from “Auto” to “In”.
Step 5: Arm the Harvest track for recording.
Tip: We recommend creating a dedicated folder for MIDI clips created with Harvest. Having done this, you can save the folder and easily access your new MIDI clips in Ableton’s browser.
FL Studio
Note: Harvest can only be used to control VST Plugins, and therefore cannot control FL’s default instrument collection.
Step 1: Load your instrument of choice into an instrument track on the Channel Rack
Step 2: In the instrument’s window, select “Detailed Settings”, followed by “VST Wrapper Settings” (top left corner gear icons)
Step 3: Under MIDI, change input port to any desired number
Step 4: Next, load Harvest onto another instrument track on the Channel Rack
Step 5: Now, again under “VST Wrapper Settings”, select the same port chosen in step 3.
Tip: We recommend creating a dedicated folder for MIDI clips created with Harvest. Make this folder accessible in your file browser by going to Options > File Settings, and selecting your folder of choice. Note that your file browser will need to be reread when a new file is created.
$0.00

Digital Product - Delivered via Email.
32 & 64 Bit


![]()


